

Claude
Get your instance’s MCP URL from your administrator or Connect a client in the console. See connection prerequisites and sign-in before starting.
These screenshots show the Claude interface provided in September 2026. Available options can depend on your account and workspace permissions.
1. Add a connector
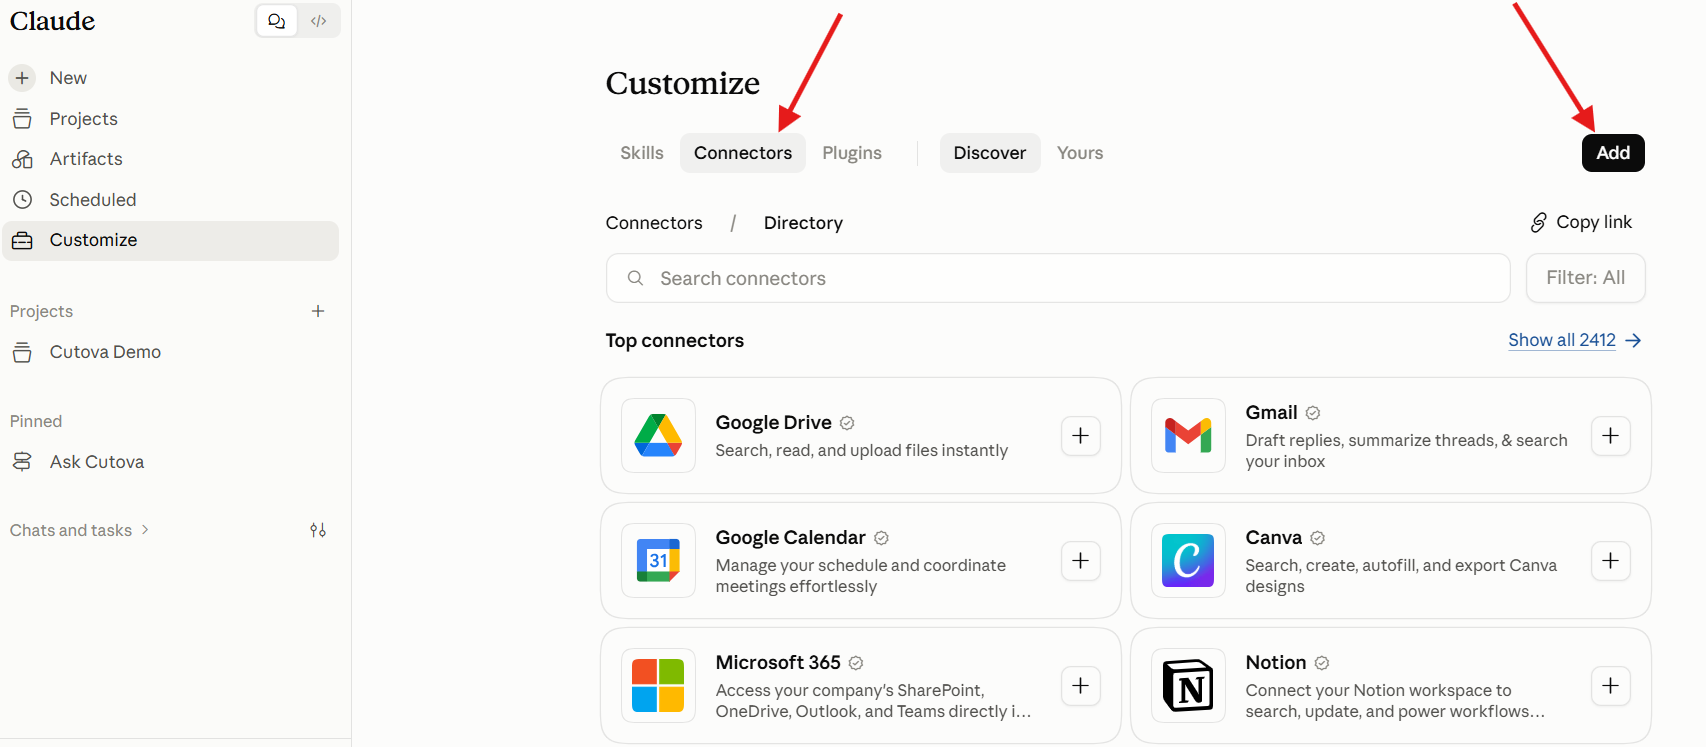
Section titled “1. Add a connector”In Claude, open Customize in the sidebar, select Connectors, and click Add.
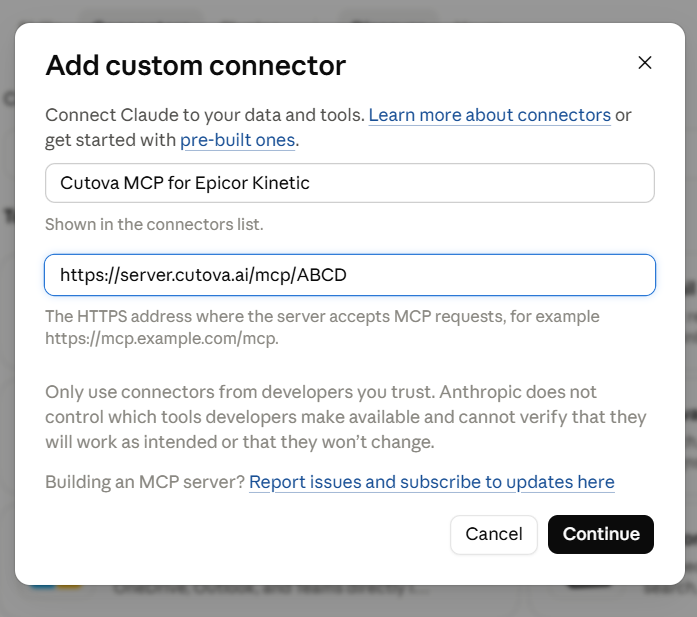
Enter a name such as Cutova MCP for Epicor Kinetic and paste your MCP URL. Click Continue.
The ABCD quick code in the screenshot is an example. Use the complete URL supplied for your instance.
2. Use automatic client registration
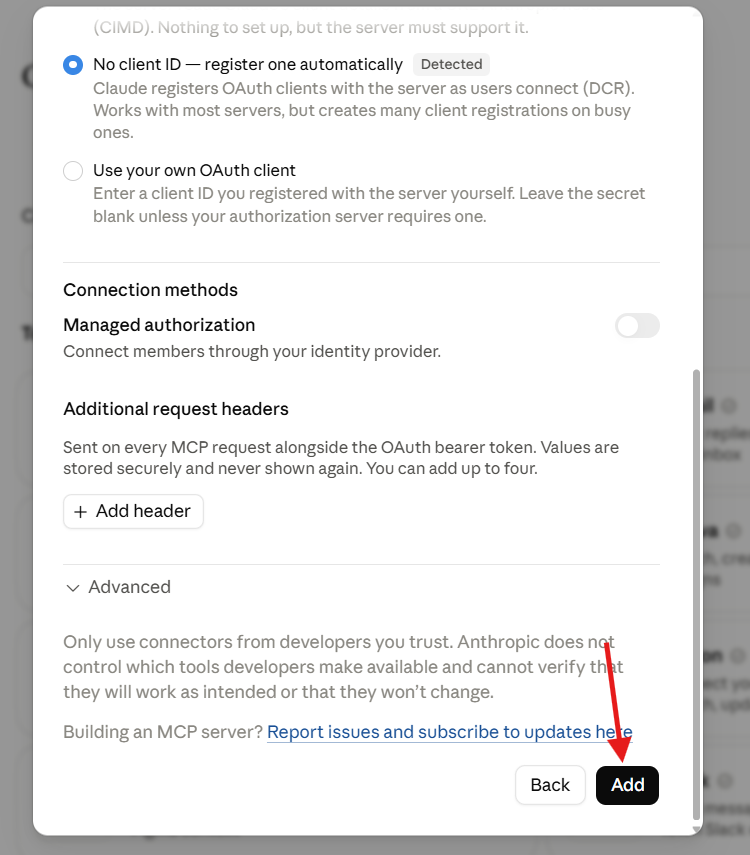
Section titled “2. Use automatic client registration”Keep the No client ID option selected so Claude registers the client automatically. You do not need to enter your own OAuth client ID or secret for this setup. Leave Managed authorization off and do not add request headers. Click Add. (Request headers are for agent tokens, which are meant for automations and Claude Code rather than this connector. See Another client.)
3. Connect and sign in
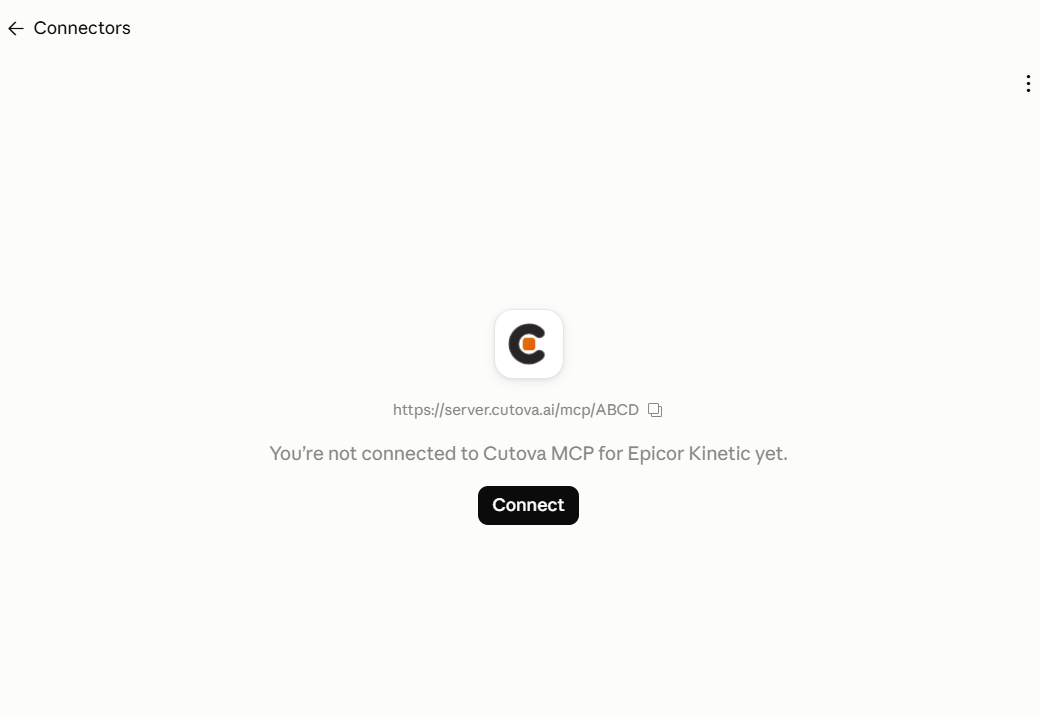
Section titled “3. Connect and sign in”On the new connector’s page, click Connect.
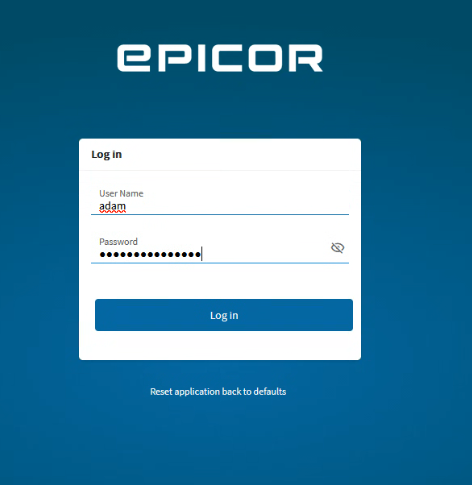
Sign in to your own Epicor environment using your normal sign-in method. Your environment may show a different sign-in screen.
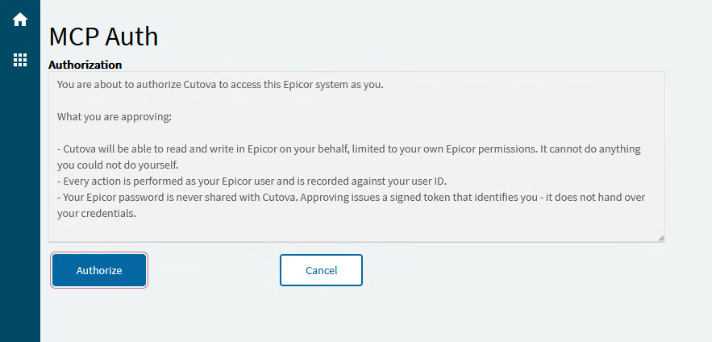
On the Epicor MCP Auth screen, review the authorization notice and click Authorize to continue.
Next, Cutova shows Authorize access to Epicor. Check the signed-in user, environment, application and destination. For this Claude connection, the application is Claude and the destination shown is https://claude.ai. If those details match the connection you started, click Allow access.
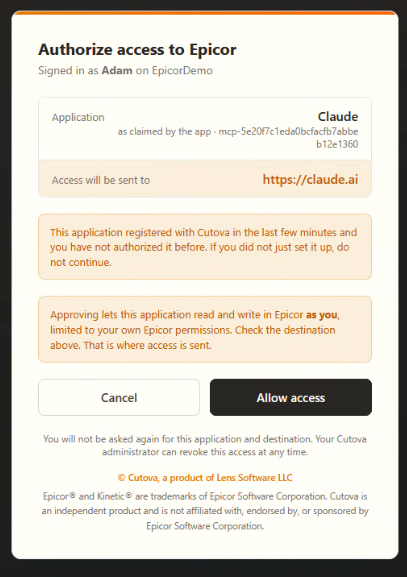
The screenshot includes a notice for a newly registered application. Continue only when you recognize the setup you just initiated. For Epicor Classic’s token-paste flow, see the shared sign-in guide.
4. Check the connection
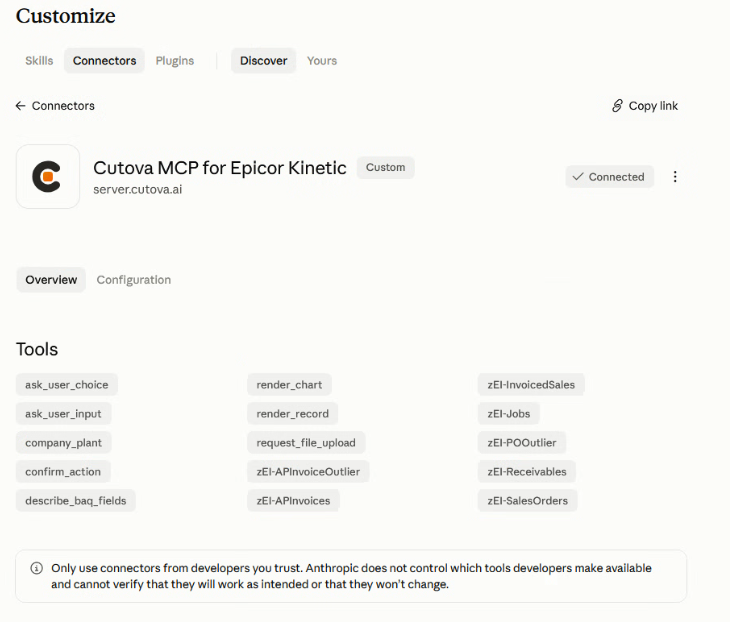
Section titled “4. Check the connection”Back in Claude, the connector should show Connected and list its available tools. Your tool list depends on what your administrator has enabled for your instance; it may differ from this example.
Open a chat and try your first tool call using a tool available in your instance.
Epicor® and Kinetic® are trademarks of Epicor Software Corporation. Cutova is an independent product and is not affiliated with, endorsed by, or sponsored by Epicor Software Corporation.
Cutova, a product of Lens Software LLC