

Publish your first tools
Publish tools when you want your assistant to use your own Epicor operations. For a prepared business workflow, install a pack first. You can add your own tools alongside it.
A published tool exposes the BAQ, Function, or Business Object operation you select. Review its permissions and test its results before sharing it with users.
Open your instance and go to the Tools tab.
Create a tool from a BAQ
Section titled “Create a tool from a BAQ”Click + Create Tool and leave the type on BAQ.
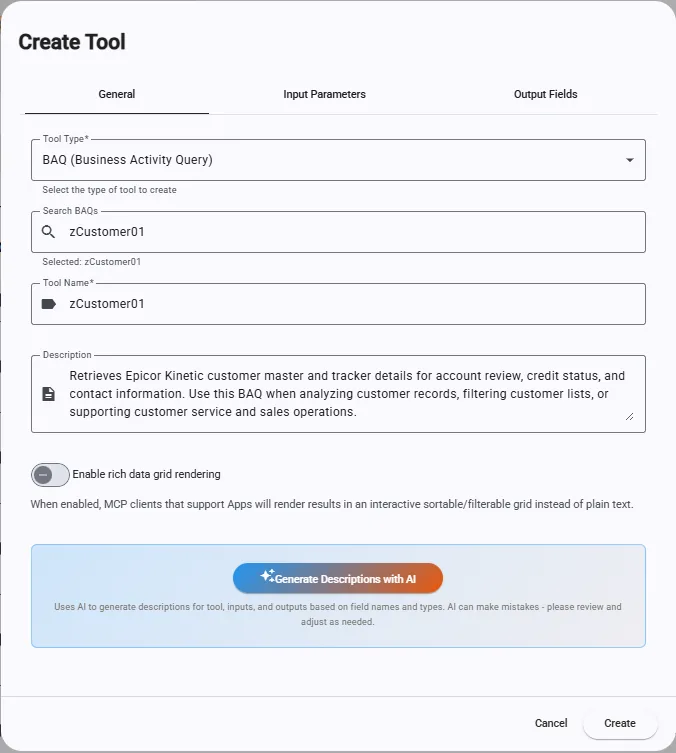
- Search for the BAQ and select it. The tool name fills in from the BAQ id; change it if you like.
- Write a description. Read the next section before you do.
- Optional: turn on rich data grid rendering. Clients that support Apps then show results as a sortable, filterable grid instead of plain text.
- Click Create.
Describe what the tool does
Section titled “Describe what the tool does”The assistant uses the tool name, description, and input schema to choose an operation and supply its parameters. Clear descriptions help it use the right tool and interpret the response.
Tool description
Section titled “Tool description”Say what it returns, when to use it, and whether it changes data. For example: “Returns customer master and credit details. Use it to look up customers by ID or name. Read-only.”
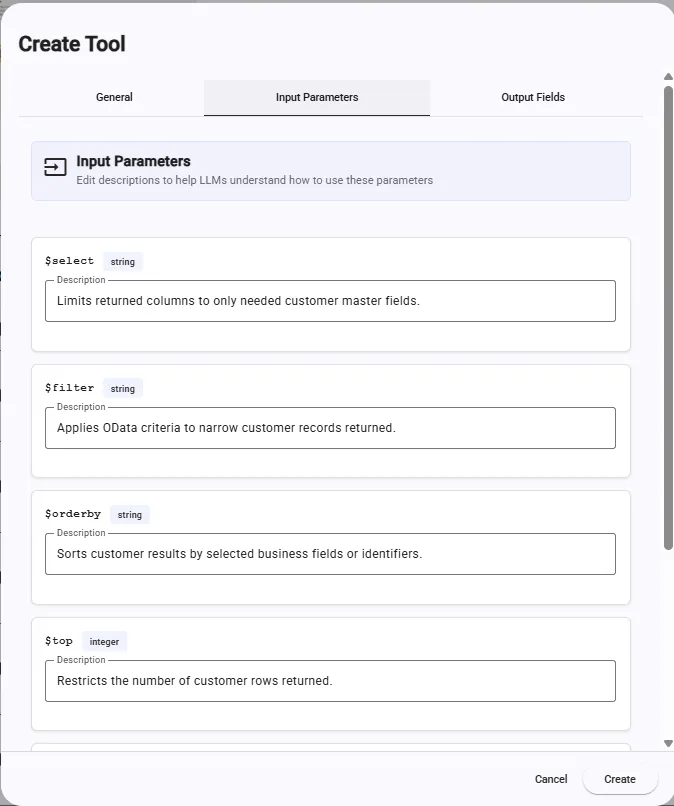
Input parameters
Section titled “Input parameters”Explain required inputs, accepted values, defaults, and filters. Identify any company, date, or currency assumptions.
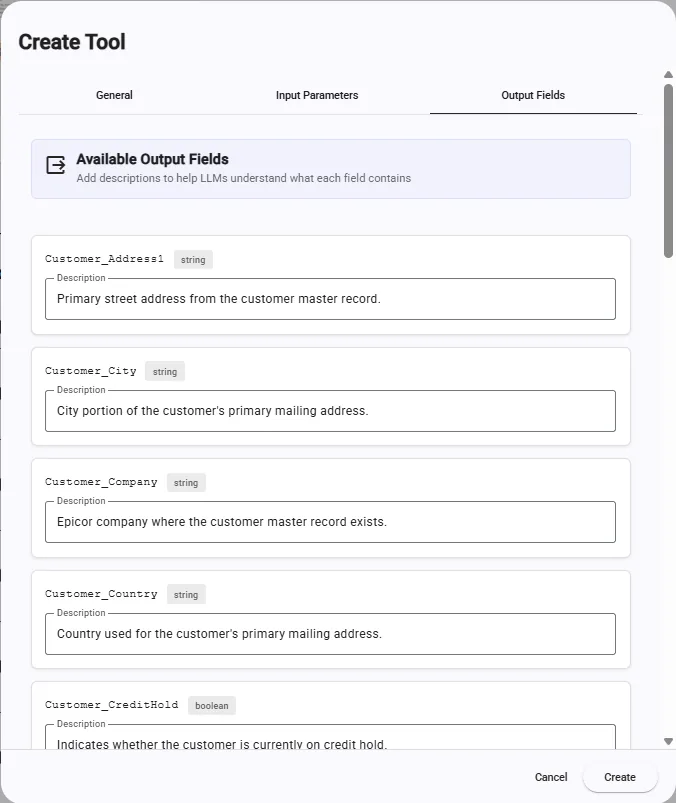
Output fields
Section titled “Output fields”Explain fields needed to interpret the answer, especially calculated amounts, units, status codes, and custom fields. Do not leave generated descriptions that assign the wrong meaning to a field.
Optional AI descriptions
Section titled “Optional AI descriptions”You can write descriptions manually or use Generate Descriptions with AI in the tool editor. The helper shows the configured provider and model. OpenAI is the default, with a link to its data use and retention information. Custom OpenAI-compatible endpoints continue to use your existing settings and their own provider terms.
- Review the tool name, type and existing description, plus input and output field names, types and existing descriptions. These are the fields sent to the displayed provider.
- Select the checkbox approving this request to send schema names, types and existing descriptions to the displayed provider.
- Select Generate Descriptions with AI.
- Review and adjust the draft before saving the tool.
Check custom fields such as Character01 carefully. Add or refine existing descriptions to explain their business meaning before generating.
Existing tool, input and output descriptions are sent as context to help preserve business meaning. The helper does not run a query or automatically send result rows. Names and descriptions can contain business information, so review them first. Approval resets after each request. Use Refresh AI helper details if the provider or model changes or the details could not load. If the helper is unavailable, you can still edit and save descriptions manually. See the privacy policy.
The other two tool types
Section titled “The other two tool types”Function
Section titled “Function”Pick a Function Library, then a function.
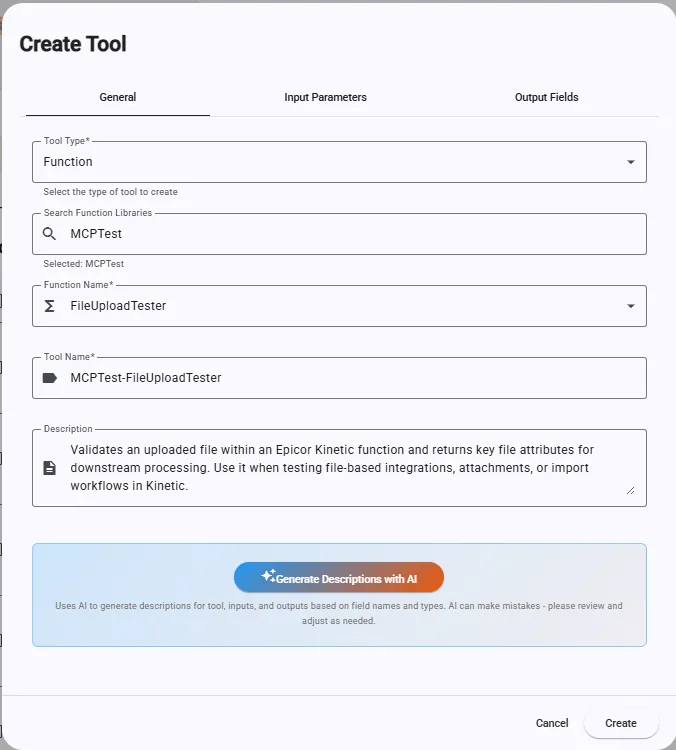
Everything above about descriptions applies. Functions add one thing BAQs do not: file handling.
Files in and out of a Function
Section titled “Files in and out of a Function”Cutova can transfer files outside the conversation to reduce token use. Two parameter settings control file uploads and downloadable outputs.
Sending a file IN
Section titled “Sending a file IN”On a Function input, enable the This is a file upload option to use a file reference instead of inline base64.
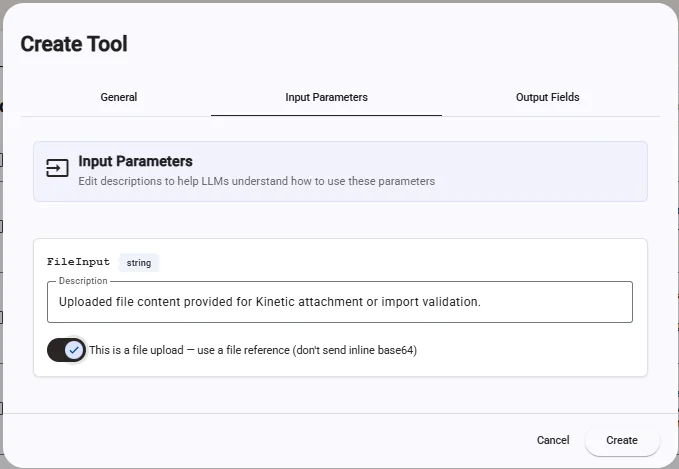
That changes what the assistant is told about the parameter. Instead of “give me the file”, it is told to run this sequence:
- Call the built-in
request_file_uploadtool, which returns a one-time upload URL and afileRef: a short identifier, not the file. - Upload the file straight to that URL, outside the conversation.
- Pass the
fileRefto your tool as that parameter.
Cutova substitutes the real file server-side before your Epicor Function ever runs, so the Function
sees exactly what it always expected. Only the small fileRef travels through the chat.
Getting a file OUT
Section titled “Getting a file OUT”On any Function output, turn on “Return as a downloadable file (off-band, not inline base64)”.
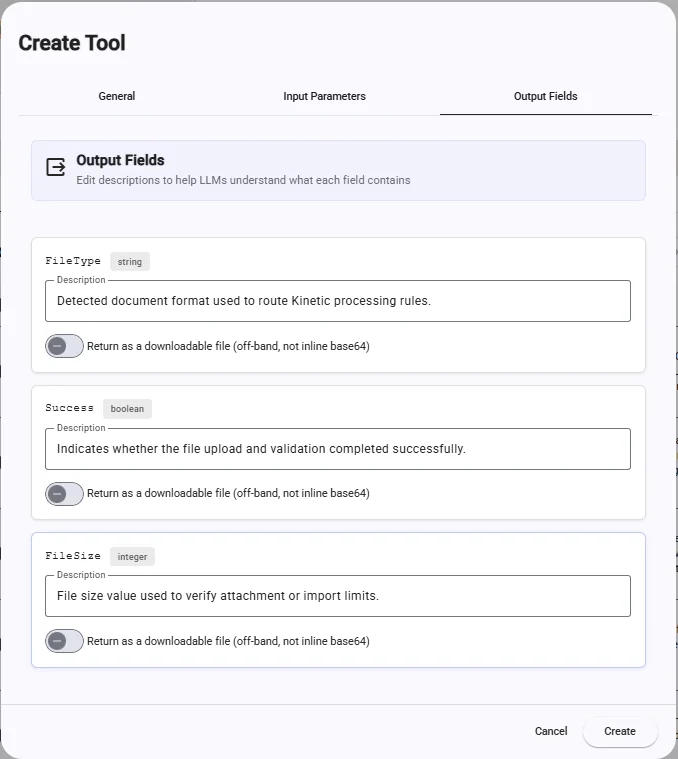
The assistant then receives a download URL and the file’s details rather than the bytes. It can hand the user the link, or fetch the file itself if it needs the contents.
Leave it off for small values. A status flag, a file size or a document type should come back inline: that is what the reader wants to see. Turn it on for the actual document: the generated PDF, the export, the attachment.
A rule of thumb
Section titled “A rule of thumb”| The value is | Setting |
|---|---|
| A document, image, export or attachment | Switch on. Off-band. |
| A name, a number, a flag, a short string | Leave off. Inline. |
Business Object
Section titled “Business Object”Pick a service type, a business object, then the endpoint to expose, such as List (Query with OData).
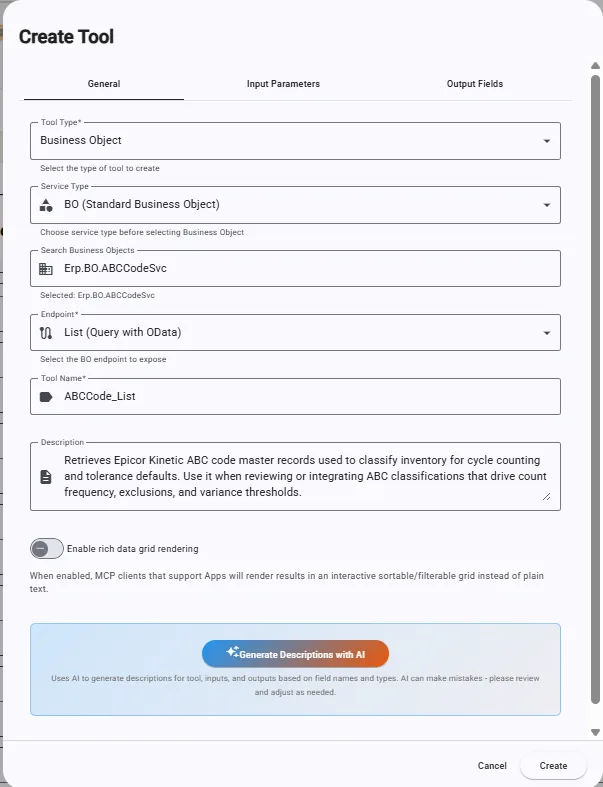
Business Object tools carry the same file switches, and the same rule of thumb applies.
Built-in tools
Section titled “Built-in tools”Cutova also ships eight tools of its own, listed on the Built-in tools tab. You publish none of them and most instances should leave the defaults alone.
Company / Plant is advertised on instances configured for multiple companies or plants and cannot be disabled there. Confirm Action lets an assistant ask for approval. Enabling it does not enforce confirmation before every write. Use appropriate Epicor permissions and your client’s approval settings for tools that change records.
See Built-in tools for what each one does and which clients can render it.
Copying tools to another instance
Section titled “Copying tools to another instance”Once you have tools set up on a test instance, Export them and Import the .zip into
production rather than rebuilding by hand.
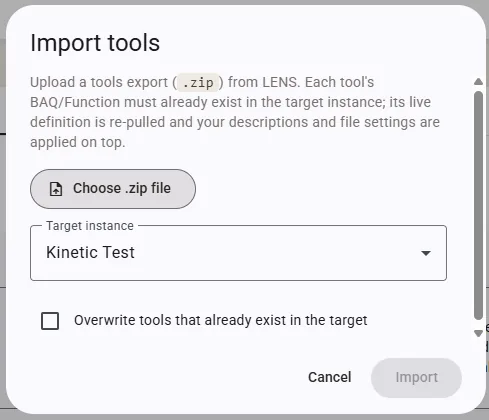
Tick Overwrite tools that already exist only when you mean to replace them.
How many to start with
Section titled “How many to start with”Start with two or three that answer questions people actually ask. A short, well-described set beats a long one, because the assistant chooses from what you publish, and a hundred vague tools makes choosing harder rather than easier.
Limit what Cutova can reach
Section titled “Limit what Cutova can reach”You can scope your Epicor API key so Cutova only reaches the BAQs, Functions and Business Objects your tools actually use. See Scope your Epicor API access for the endpoints to include.
Next: Built-in tools.
Epicor® and Kinetic® are trademarks of Epicor Software Corporation. Cutova is an independent product and is not affiliated with, endorsed by, or sponsored by Epicor Software Corporation.
Cutova, a product of Lens Software LLC