

VS Code with GitHub Copilot
Get your instance’s MCP URL from your administrator or Connect a client in the console. See connection prerequisites and sign-in before starting.
These screenshots show the VS Code Agents interface provided in September 2026. Use GitHub Copilot for this flow. Available options can depend on your VS Code version and organization settings.
1. Open the Agents window
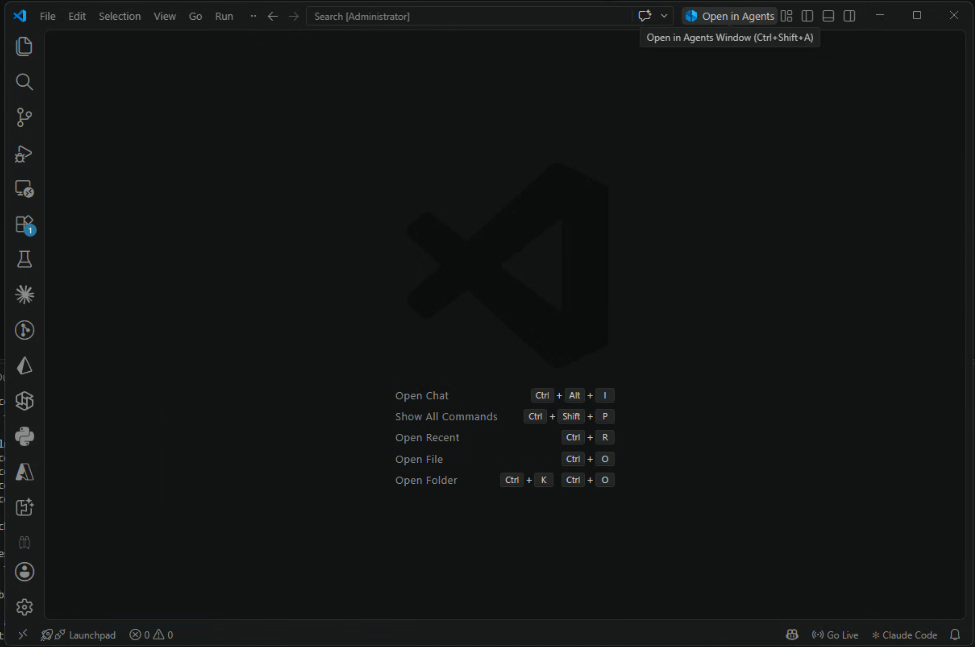
Section titled “1. Open the Agents window”In VS Code, select Open in Agents in the title bar. The Windows shortcut shown is Ctrl+Shift+A.
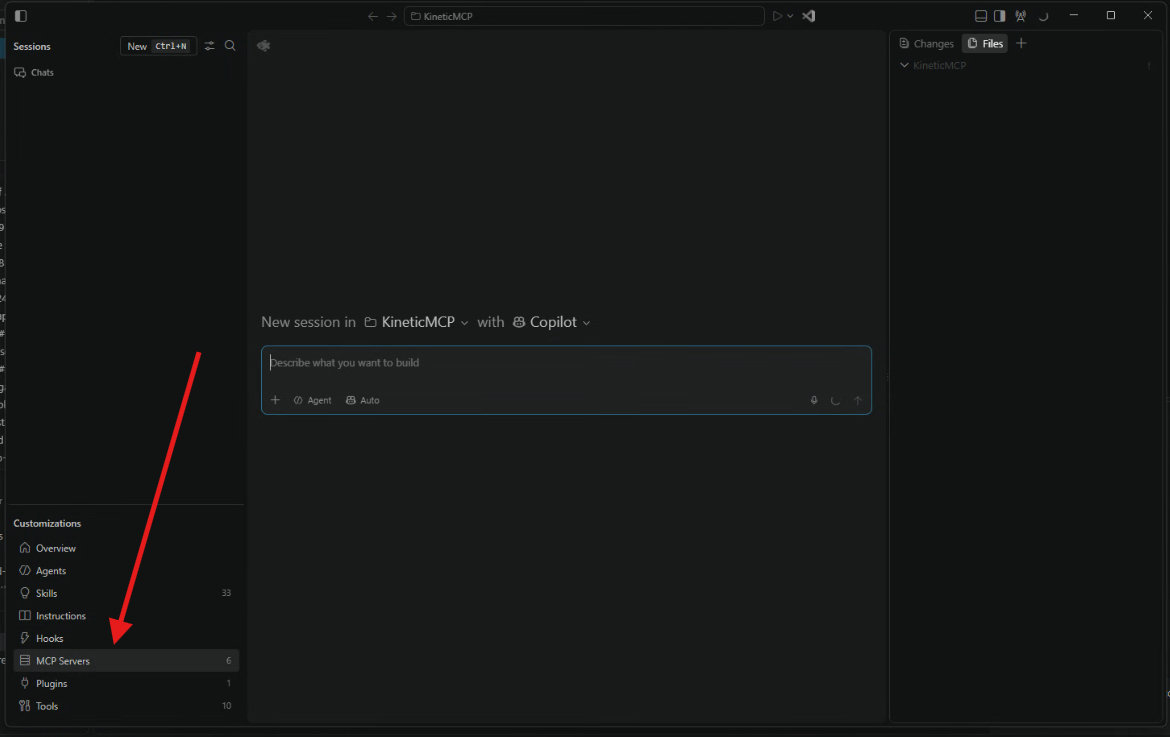
Under Customizations, select MCP Servers.
2. Add the HTTP server
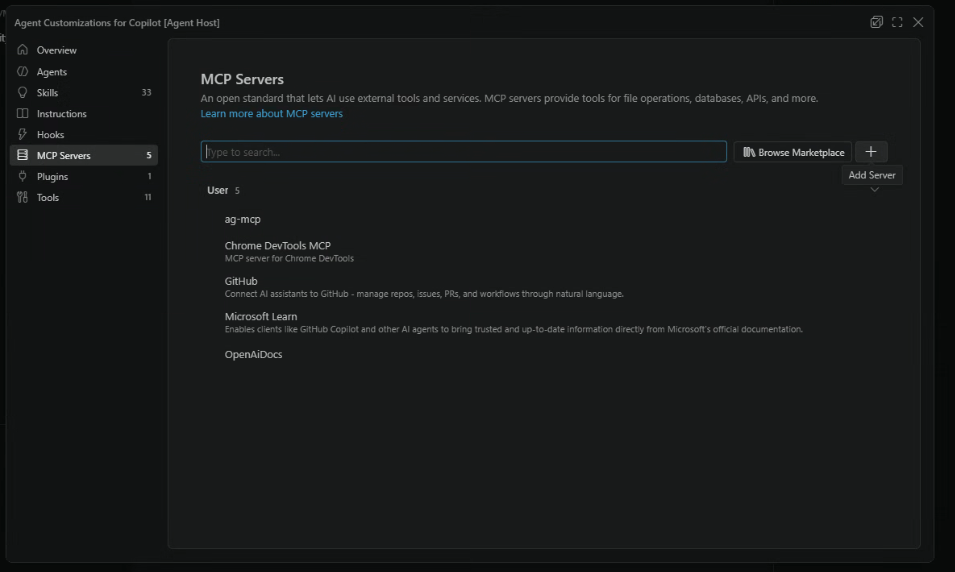
Section titled “2. Add the HTTP server”Click the + button beside Browse Marketplace to add a server.
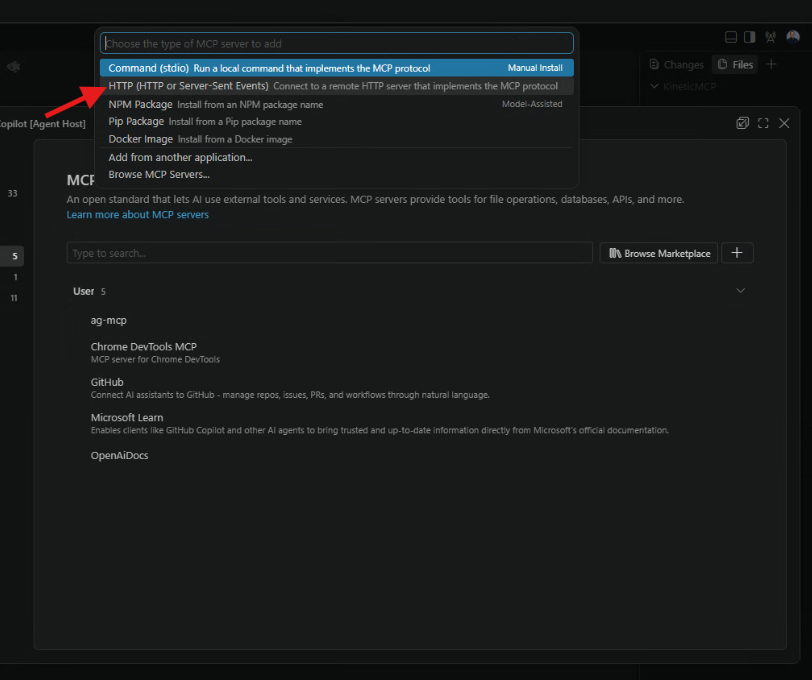
Choose HTTP (HTTP or Server-Sent Events) from the server types. This is VS Code’s label for the remote HTTP option; Cutova uses Streamable HTTP.
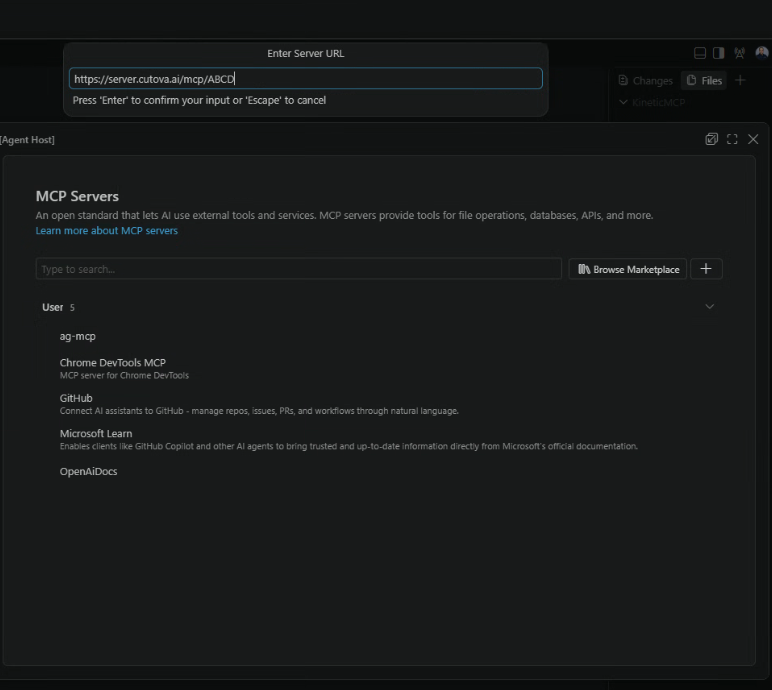
Paste your complete MCP URL and press Enter. The ABCD quick code in the screenshot is an example; use the URL for your own instance.
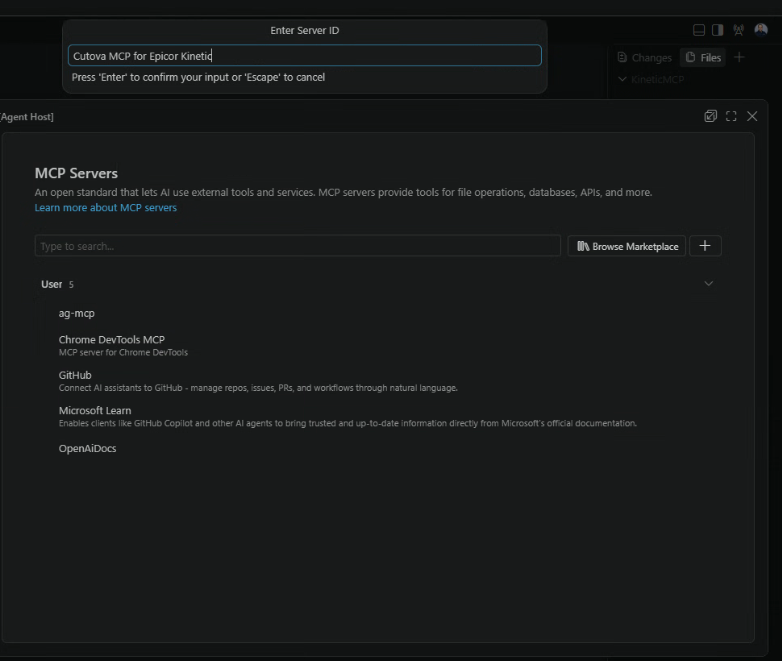
Enter a server ID such as Cutova MCP for Epicor Kinetic and press Enter.
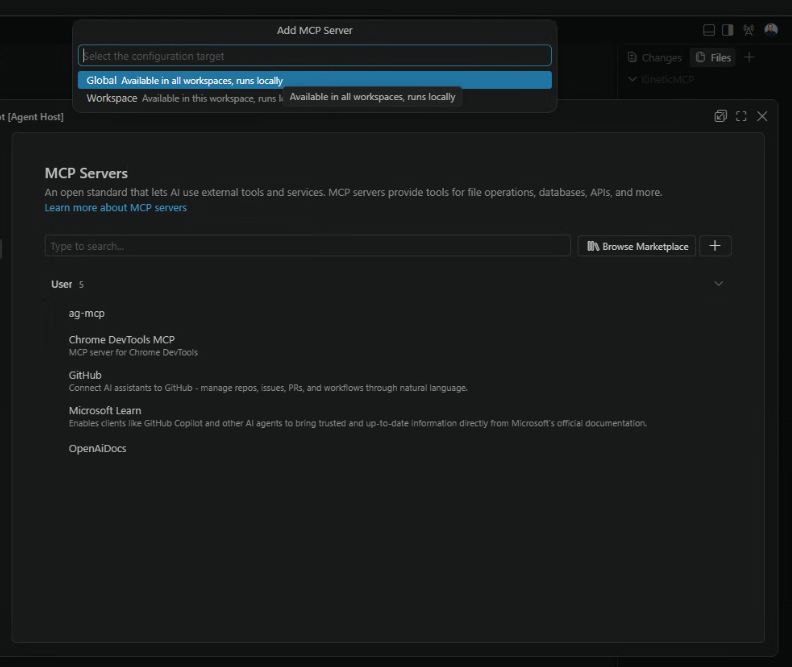
Choose Global to make the configuration available across your workspaces, or Workspace to keep it scoped to the current workspace. The example selects Global.
3. Allow authentication and sign in to Epicor
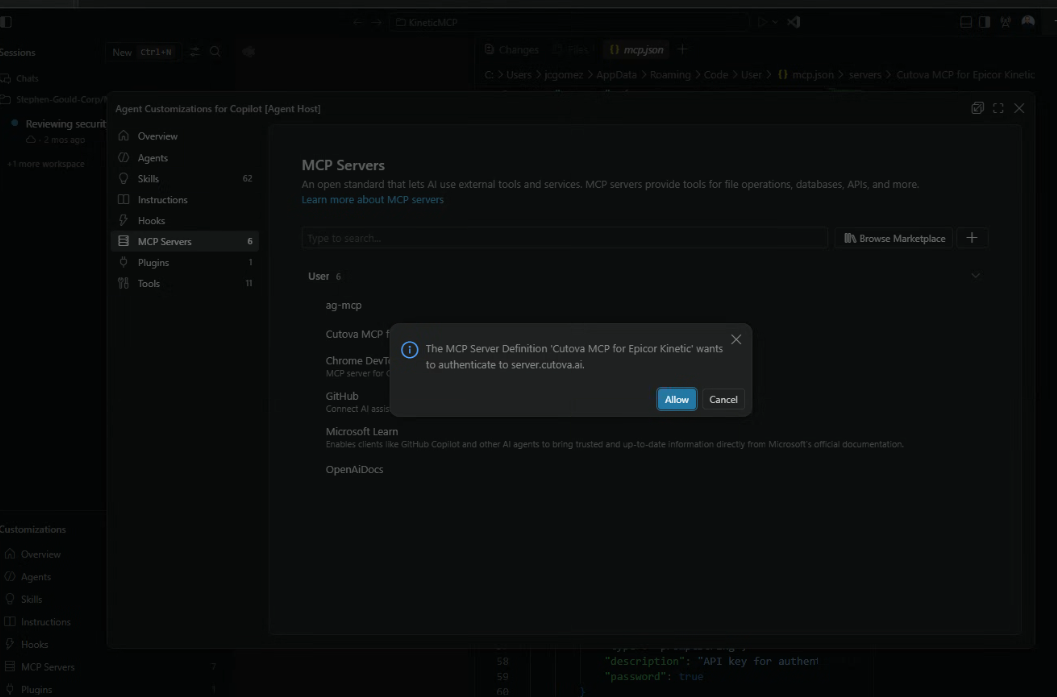
Section titled “3. Allow authentication and sign in to Epicor”VS Code asks whether the MCP server may authenticate to the Cutova server. Check the server you just added, then click Allow.
Your browser opens the sign-in flow. Sign in to your own Epicor environment using your normal account and sign-in method.
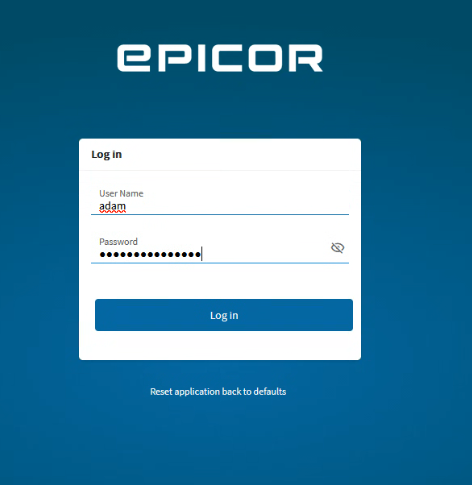
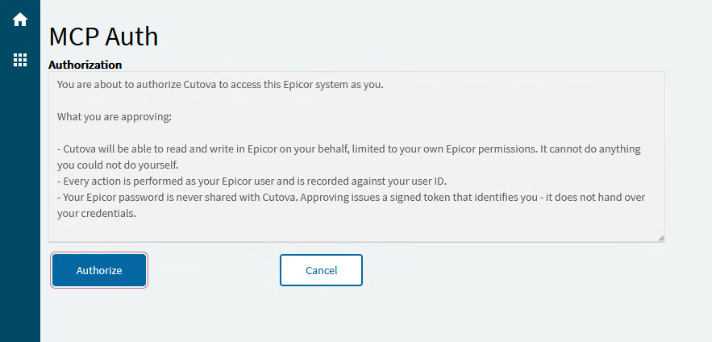
On the Epicor MCP Auth screen, review the notice and click Authorize.
4. Approve the VS Code connection in Cutova
Section titled “4. Approve the VS Code connection in Cutova”Cutova then shows Authorize access to Epicor. Check the signed-in user, environment, application and destination before clicking Allow access.
In this example, the application is Visual Studio Code and the destination is a local address such as http://127.0.0.1:33418. This returns sign-in to VS Code on your computer. The port can vary; do not copy this example address into your MCP server settings.
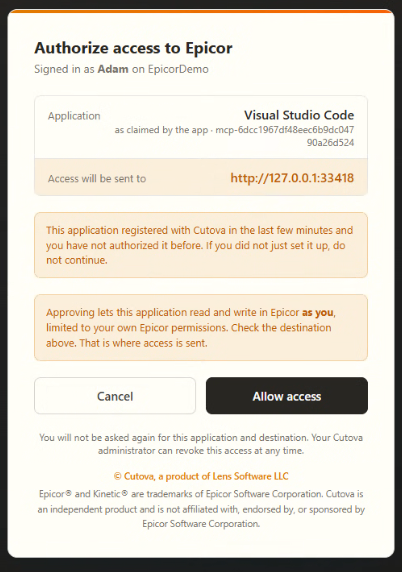
Approve only the connection you started and recognize. For Epicor Classic’s token-paste flow, see the shared sign-in guide.
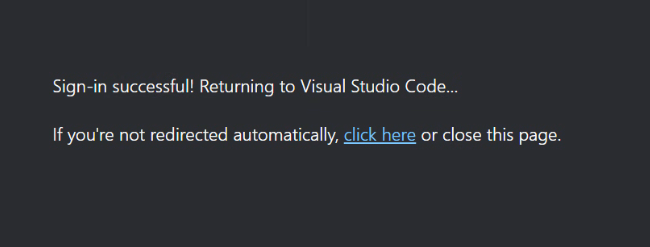
The browser confirms Sign-in successful! Returning to Visual Studio Code…. Return to VS Code. If it does not redirect automatically, use the page’s link or close that sign-in page.
5. Check the server and try a tool
Section titled “5. Check the server and try a tool”Confirm Cutova appears in MCP Servers.
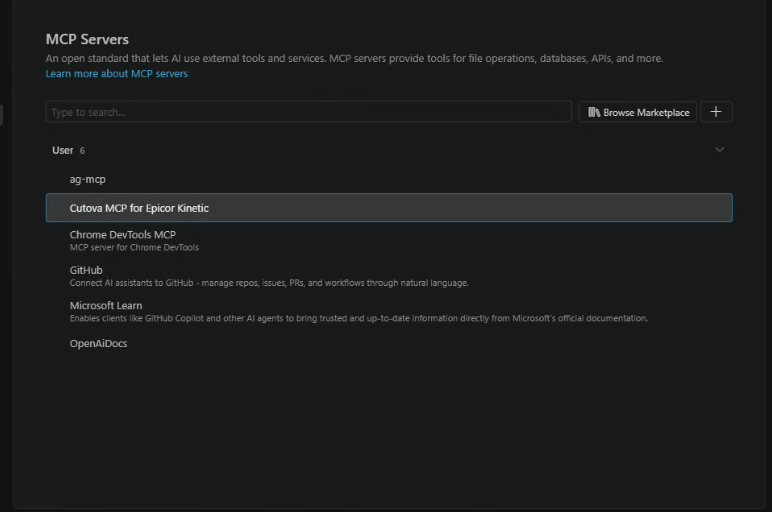
Return to your Copilot session and try a first tool call using a tool enabled for your instance. Review any tool permission prompt before continuing.
Epicor® and Kinetic® are trademarks of Epicor Software Corporation. Cutova is an independent product and is not affiliated with, endorsed by, or sponsored by Epicor Software Corporation.
Cutova, a product of Lens Software LLC